Having set up a website on a live server using Drupal I wanted to set up a local copy for development without risking stuffing up the live version. This post describes how I set up Drupal 7 on my Mac OSX Lion/10.7.
Part 1: Local Drupal7 on Mac OSX Lion
Part 2: Set-up Multisite Drupal 7
Part 3: Using Drush to sync live and dev Drupal websites
I wanted to test code safely without risking the production site
Can use better text editors such as Sublime
Drupal 7.22
I will also be focussing on the Zen Drupal theme (version 7.x-5.1) although this may not be relevant to what I'm doing here.
Part 1 (you're here!)
Have an AMP stack (Apache, MySQL and PHP)
Create the Drupal database
Download and configure Drupal 7.22
In Part 2 I set up a multi-site drupal installation - so that my web server doesn't just use the default drupal website.
In Part 3 I create a local copy of a live site from a server.
Make new local copy of my server site
Decide workflow for dev (local) and live (server) sites.
Synchronise live to dev, change dev, synchronise dev to live
Drupal recommends Apache 2.x
Other requirements PHP 5.3; MySQL 5.0.15
Type in httpd -v
Server version: Apache/2.2.22 (Unix)
Server built: Jul 12 2012 15:11:26
Type in php -v
PHP 5.3.15 with Suhosin-Patch (cli) (built: Jul 31 2012 14:49:18)
Copyright (c) 1997-2012 The PHP Group
Zend Engine v2.3.0, Copyright (c) 1998-2012 Zend Technologies
Out of the box php is not enabled. This is quickly rectified by editing the apache config file in Terminal. This requires root user access to your Mac rather than the default admin user - see instructions for turning root on from Apple. Having done that change the apache config file as follows:
sudo nano /etc/apache2/httpd.conf
ctrl-w opens the Find box so type php and press enter

Uncomment the LoadModule php5_module line by removing the #
ctrl-o and enter to save and ctrl-x to exit
 Once installed open up System Preferences and then the MySQL Preferences to turn on the server.
Now to make using mysql in a Terminal's command line I added export PATH=$PATH:/usr/local/mysql/bin to my path similarly to how I got Android's ndk-build command onto path by creating a .bashrc file in my username folder ('cd ~' to get there). This allows the mysql command to be run from any directory without having to type out the whole path. To make sure it works type mysql into Terminal and you should see a paragraph of text starting with Welcome to the MySQL monitor. To exit type \q.
Now it's installed there is a little config to do.
Setting password: mysql_secure_installation and answering yes to all questions
Finally starting the Web Sharing in System Preferences -> Sharing and clicking on the button to create a personal website folder.


Finally test php by creating a php file in your ~/Sites folder to display php information.
In Terminal
cd ~/Sites
nano phpinfo.php
<?php phpinfo(); ?>
ctrl-o and enter to save, ctrl-x to exit
In browser go to localhost/~mattmapleston/phpinfo.php to see a load of configuration information about your locally hosted web server including Apache, Mysql and PHP.
Thanks to Neil Gee's excellent post (although a couple of typos/errors)
user$ mysqladmin -u root -p create <databasename>
Enter password: <pwd>
user$ mysql -u root -p
Enter password: <pwd>
Welcome to the MySQL monitor. Commands end with ; or \g.
Your MySQL connection id is 3
Server version: 5.6.11 MySQL Community Server (GPL)
Copyright (c) 2000, 2013, Oracle and/or its affiliates. All rights reserved.
Oracle is a registered trademark of Oracle Corporation and/or its
affiliates. Other names may be trademarks of their respective
owners.
Type 'help;' or '\h' for help. Type '\c' to clear the current input statement.
mysql> show databases;
+--------------------+
| Database |
+--------------------+
| information_schema |
| <databasename> |
| mysql |
| performance_schema |
+--------------------+
4 rows in set (0.01 sec)
mysql> CREATE USER <username>@localhost;
Query OK, 0 rows affected (0.00 sec)
mysql> SET PASSWORD FOR <username>@localhost= PASSWORD('<pwd>');
Query OK, 0 rows affected (0.01 sec)
mysql> GRANT ALL PRIVILEGES ON <databasename>.* TO <username>@localhost IDENTIFIED BY '<pwd>';
Query OK, 0 rows affected (0.00 sec)
mysql> FLUSH PRIVILEGES;
Query OK, 0 rows affected (0.00 sec)
mysql> EXIT


Fill in database information as set in the previous step of creating the Drupal database. At this point I had an error communicating with the server - a 2002 error. The solution thanks again to Neil was

Add some information about the site, the site maintenance account is important as it sets what will be 'User 1' who has some special abilities useful later on.

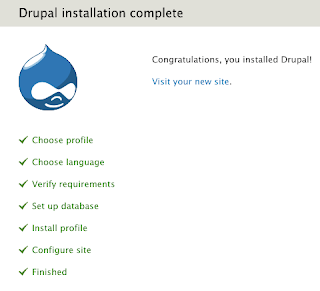
All should be good and you should pat yourself on your back, you've installed Drupal.

Part 1: Local Drupal7 on Mac OSX Lion
Part 2: Set-up Multisite Drupal 7
Part 3: Using Drush to sync live and dev Drupal websites
Why?
I wanted to work on the site offlineI wanted to test code safely without risking the production site
Can use better text editors such as Sublime
Assumptions?
I am using Mac OSX Lion aka 10.7Drupal 7.22
I will also be focussing on the Zen Drupal theme (version 7.x-5.1) although this may not be relevant to what I'm doing here.
How?
The steps to create a functional local version of a Drupal based website are:Part 1 (you're here!)
Have an AMP stack (Apache, MySQL and PHP)
Create the Drupal database
Download and configure Drupal 7.22
In Part 2 I set up a multi-site drupal installation - so that my web server doesn't just use the default drupal website.
In Part 3 I create a local copy of a live site from a server.
Make new local copy of my server site
Decide workflow for dev (local) and live (server) sites.
Synchronise live to dev, change dev, synchronise dev to live
AMP Stack on Mac OSX Lion
The AMP requirements for Drupal 7 are:Drupal recommends Apache 2.x
Other requirements PHP 5.3; MySQL 5.0.15
Check Apache and PHP
Mac OSX 10.7 comes with Apache 2.2.xx and PHP 5.3.xx pre-installed, you can check this in Terminal:Type in httpd -v
Server version: Apache/2.2.22 (Unix)
Server built: Jul 12 2012 15:11:26
Type in php -v
PHP 5.3.15 with Suhosin-Patch (cli) (built: Jul 31 2012 14:49:18)
Copyright (c) 1997-2012 The PHP Group
Zend Engine v2.3.0, Copyright (c) 1998-2012 Zend Technologies
Out of the box php is not enabled. This is quickly rectified by editing the apache config file in Terminal. This requires root user access to your Mac rather than the default admin user - see instructions for turning root on from Apple. Having done that change the apache config file as follows:
sudo nano /etc/apache2/httpd.conf
ctrl-w opens the Find box so type php and press enter

Uncomment the LoadModule php5_module line by removing the #
ctrl-o and enter to save and ctrl-x to exit
Install MySQL
MySQL is an open source application available for all platforms. You can download the latest version of MySQL for your platform in a number of formats (including source code!) The easiest way for Mac is to download Mac OS X ver. 10.7 (x86, 32-bit), DMG Archive. NB This download is around 150MB. When you click on download you will be asked to login/sign up. You don't have to do this as there is a 'No Thanks' link at the bottom of that page. Clicking the downloaded .dmg file opens a window containing the packages to install by double clicking them and following the wizard: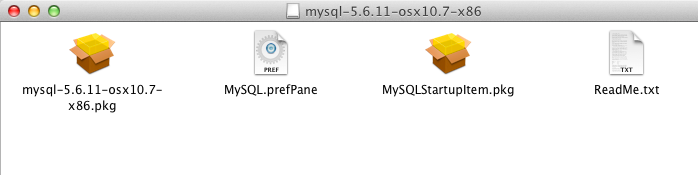
Now to make using mysql in a Terminal's command line I added export PATH=$PATH:/usr/local/mysql/bin to my path similarly to how I got Android's ndk-build command onto path by creating a .bashrc file in my username folder ('cd ~' to get there). This allows the mysql command to be run from any directory without having to type out the whole path. To make sure it works type mysql into Terminal and you should see a paragraph of text starting with Welcome to the MySQL monitor. To exit type \q.
Now it's installed there is a little config to do.
Setting password: mysql_secure_installation and answering yes to all questions
Finally starting the Web Sharing in System Preferences -> Sharing and clicking on the button to create a personal website folder.

Testing the AMP
To make sure it's all working, open a browser and go to localhost and in another window localhost/~<username>, you should see the following
Finally test php by creating a php file in your ~/Sites folder to display php information.
In Terminal
cd ~/Sites
nano phpinfo.php
<?php phpinfo(); ?>
ctrl-o and enter to save, ctrl-x to exit
In browser go to localhost/~mattmapleston/phpinfo.php to see a load of configuration information about your locally hosted web server including Apache, Mysql and PHP.
Thanks to Neil Gee's excellent post (although a couple of typos/errors)
Create Drupal Database
This is all done in the command line:user$ mysqladmin -u root -p create <databasename>
Enter password: <pwd>
user$ mysql -u root -p
Enter password: <pwd>
Welcome to the MySQL monitor. Commands end with ; or \g.
Your MySQL connection id is 3
Server version: 5.6.11 MySQL Community Server (GPL)
Copyright (c) 2000, 2013, Oracle and/or its affiliates. All rights reserved.
Oracle is a registered trademark of Oracle Corporation and/or its
affiliates. Other names may be trademarks of their respective
owners.
Type 'help;' or '\h' for help. Type '\c' to clear the current input statement.
mysql> show databases;
+--------------------+
| Database |
+--------------------+
| information_schema |
| <databasename> |
| mysql |
| performance_schema |
+--------------------+
4 rows in set (0.01 sec)
mysql> CREATE USER <username>@localhost;
Query OK, 0 rows affected (0.00 sec)
mysql> SET PASSWORD FOR <username>@localhost= PASSWORD('<pwd>');
Query OK, 0 rows affected (0.01 sec)
mysql> GRANT ALL PRIVILEGES ON <databasename>.* TO <username>@localhost IDENTIFIED BY '<pwd>';
Query OK, 0 rows affected (0.00 sec)
mysql> FLUSH PRIVILEGES;
Query OK, 0 rows affected (0.00 sec)
mysql> EXIT
Download and install Drupal 7
This instructions are very similar to installing Drupal 7 on a server but the full instructions are reproduced here as a standalone post.
Back in Terminal do the following:
<user>$ mkdir ~/Sites/drupal
<user>$ cd ~/Sites/drupal/
<user>$ curl -O http://ftp.drupal.org/files/projects/drupal-7.22.tar.gz
% Total % Received % Xferd Average Speed Time Time Time Current
Dload Upload Total Spent Left Speed
100 3108k 100 3108k 0 0 232k 0 0:00:13 0:00:13 --:--:-- 270k
<user>$ tar xvzf drupal-7.22.tar.gz
*Massive list of unpacked files
<user>$ mv drupal-7.22/* .
<user>$ mv drupal-7.22/.* .
<user>$ rm -rf drupal-*
<user>$ cd ~/Sites/drupal/sites/default
<user>$ cp default.settings.php settings.php
<user>$ chmod -R a+w default/
<user>$ chmod -R a+w all/
Next return to a browser and go to the URL something like localhost/~workingmatt/drupal where workingmatt must be replaced by your own username. This will take you to the beginning of the browser based stage of the installation process as shown below.

Choose your language...

<root>$ mkdir /var/mysql
<root>$ cd /var/mysql/
<root>$ ln -s /tmp/mysql.sock /var/mysql/mysql.sock


All should be good and you should pat yourself on your back, you've installed Drupal.

When you visit your new site at localhost/~<username/drupal/ you will see the default site

In Part 2 I will make new local copy of my server site. In Part 3 I decide workflow for dev (local) and live (server) sites, synchronise live to dev, change dev, synchronise dev to live.
No comments:
Post a Comment